Day 11: AWS Cloud Resume Challenge
For the past two days, I built my database (DynamoDB) and wrote the backend logic (AWS Lambda). Today, I needed to build the bridge that allows my website to actually talk to that logic. Enter API Gateway.
If Lambda is the "Chef" cooking up the data, API Gateway is the "Waiter" taking the order from the website and handing it to the kitchen.
I decided to go with an HTTP API instead of a traditional REST API for this project. Why? AWS introduced HTTP APIs as a newer, leaner alternative. They are specifically designed for serverless architectures, they are significantly faster, and they are up to 71% cheaper than REST APIs. Since I just need a simple way to trigger a Lambda function, HTTP API was the perfect, cost-effective tool for the job.
Because API Gateway can be notoriously confusing to navigate, I kept my setup process as streamlined as possible:
Created the API: Spun up a standard HTTP API with auto-deploy enabled.
Set the Route: Created a simple
GETroute at/count.The Handoff: Attached my Lambda function as the integration target so the API knows exactly what to trigger.
The Security Guard (CORS): Configured Cross-Origin Resource Sharing (CORS) to allow
GETrequests. Without this crucial step, web browsers will automatically block the data for security reasons!
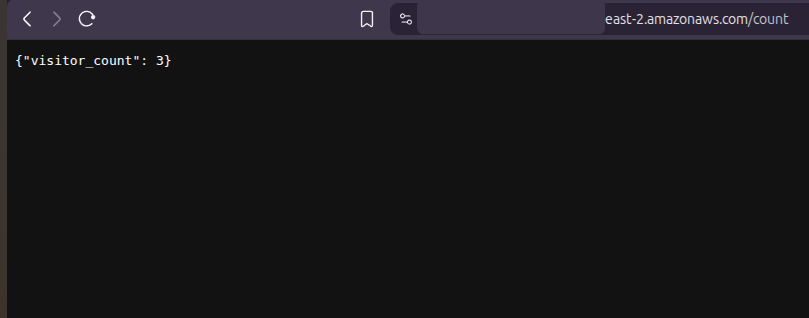
After saving the configuration, I took the live Invoke URL, pasted it into my browser, added /count to the end, and hit enter. Seeing my JSON visitor count pop up on a live webpage was incredibly satisfying!
Up Next:
Everything is fully functional. Tomorrow, I just need to plug this API URL into my frontend JavaScript, and the full-stack loop will be complete!
#AWS #APIGateway #Serverless #CloudComputing #DevOps #AWSCloudResumeChallenge #Day11BuildInPublic
Comments
Join the discussionNo comments yet. Be the first to comment.